


Overview
This section provides an overview of the following topics related to the Valid Initial Retiree List and the Monthly Retiree List:
User Roles
- The Authorized Representative, Account Manager, and Designee with the View/Send/Receive Retiree Data privilege can submit the Valid Initial Retiree List and Monthly Retiree Lists using the RDS Secure Website.
- Vendors and Plan Sponsors with pre-existing Connect:Direct connections can submit the Valid Initial Retiree List and Monthly Retiree Lists to CMS' RDS Center.
- VDSA partners submitting non-Medicare Secondary Payer (MSP) records and Mandatory Insurer Reporting (MIR) participants using the expanded implementation model can submit the Valid Initial Retiree List and Monthly Retiree Lists to CMS' RDS Center.
Timing & Dependencies
It takes CMS' RDS Center approximately 24 – 48 hours to process the Valid Initial Retiree List and Monthly Retiree Lists. If more than three business days pass without receiving the Retiree Response File, contact CMS' RDS Center for more information.
The Medicare Beneficiary Database (MBD) is the system of record for beneficiary eligibility data and resides outside of CMS' RDS Center. There are several factors that could impact processing times, such as the volume of files received by MBD, the number of records in the file(s), and the types of responses returned for each beneficiary in those files. The Plan Sponsor and associated Vendors, as applicable, shall receive notification once the file has completed processing and is available.
After the Valid Initial Retiree List or a Monthly Retiree List has been successfully uploaded to the RDS Secure Website, the list of uploaded retiree files is displayed.
Note: The Initial Retiree List will not be processed until the Authorized Representative signs the Plan Sponsor Agreement and submits the Valid Initial Online Application.
CMS' RDS Center sends a Retiree Response File with applicable RDS Reason Codes acknowledging that the file received has been processed. Changes to retiree information throughout the plan year for a given application should be included in Monthly Retiree Lists. The first Monthly Retiree List should be sent approximately 30 days from the date the Valid Initial Retiree Response File was received and processed.
Retiree Enrollment Changes
Plan Sponsors should utilize the Monthly Retiree List to add, update, or delete Subsidy Periods as applicable.
If the Plan Sponsor believes a new beneficiary is now eligible for the subsidy, send an ADD record to CMS' RDS Center with the Subsidy Period requested.
If the Plan Sponsor's coverage of a Qualifying Covered Retiree (QCR) or their demographic information has changed from what was previously reported, send an UPD record to CMS' RDS Center with the new data.
If the QCR is no longer eligible for the subsidy, send a DEL record to CMS' RDS Center. All coverage for this QCR under this Benefit Option is removed.
CMS' RDS Center will process multiple records for the same beneficiary within the same retiree file. DEL records will be processed first, followed by ADD and UPD. CMS' RDS Center will disregard the order that these records appear in the file, and will process in the aforementioned order.
Retiree File Layouts and Copybook
The following Retiree File layouts and copybook are available for reference:
Step-by-Step Instructions
This section contains step-by-step instructions to upload a Retiree List using the RDS Secure Website.
To access the RDS Secure Website, and navigate to the Dashboard page, review instructions to access the RDS Secure Website.
On the Dashboard page:
-
Select the appropriate Application ID.

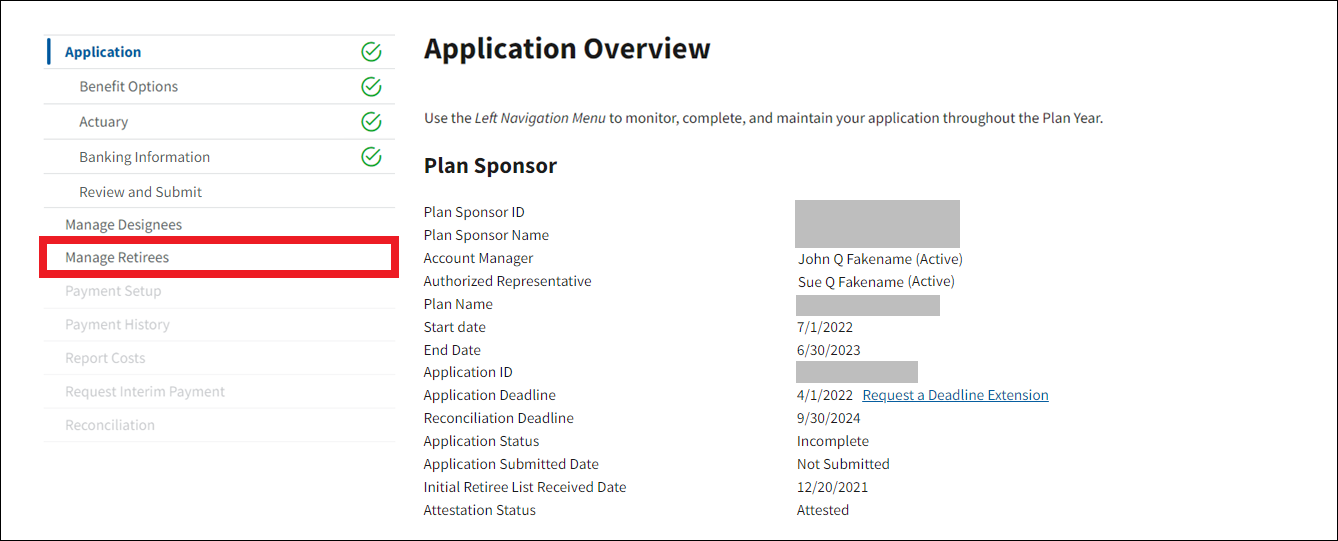
On the Application Overview page:
-
Select Manage Retirees.
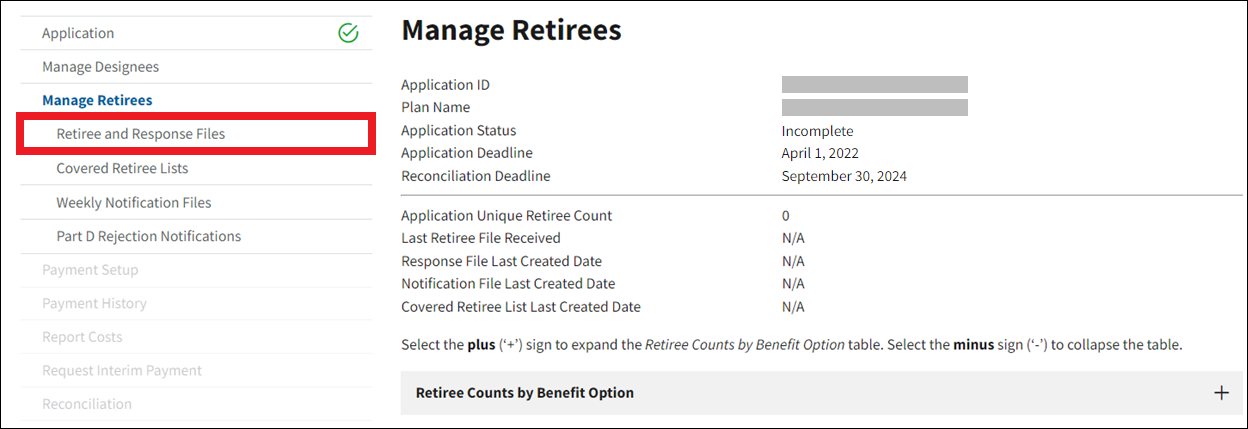
On the Manage Retiree page:
-
Select Retiree and Response Files.
On the Retiree and Response Files page:
-
Drag and drop the file you wish to upload into the Upload a Retiree File text box.
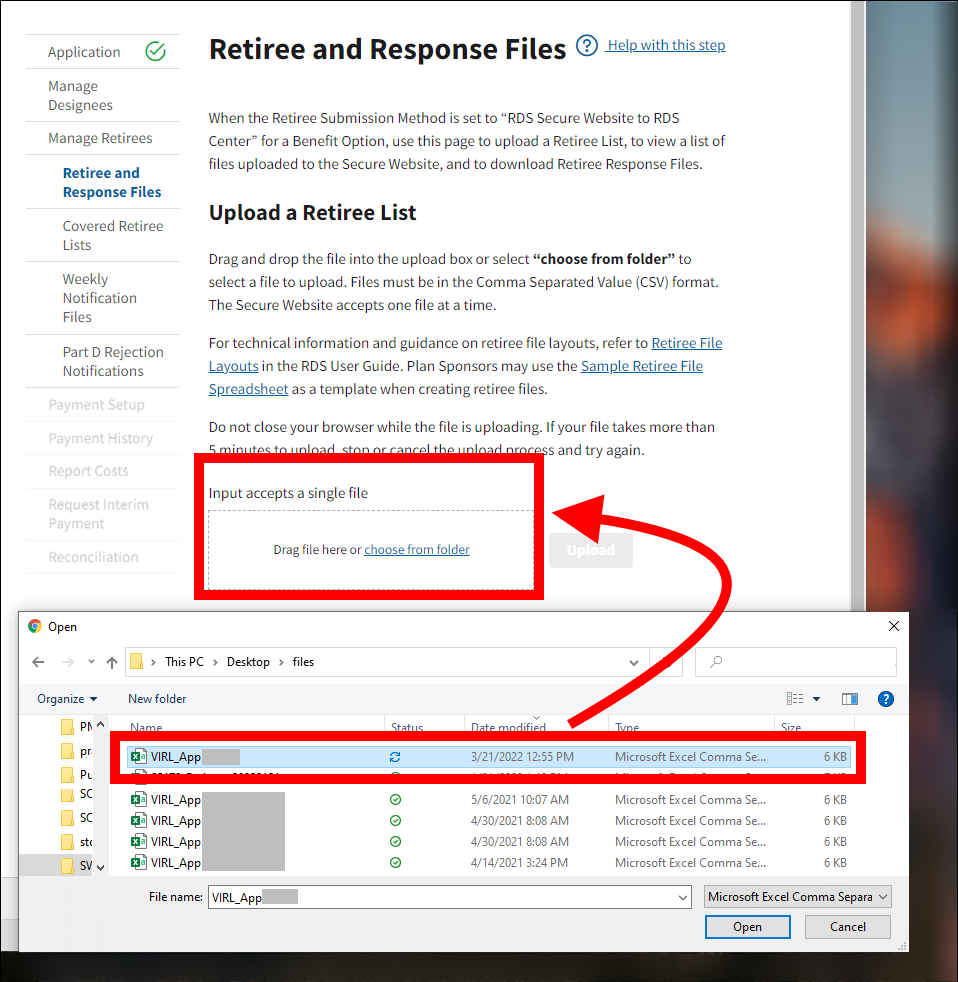
Or
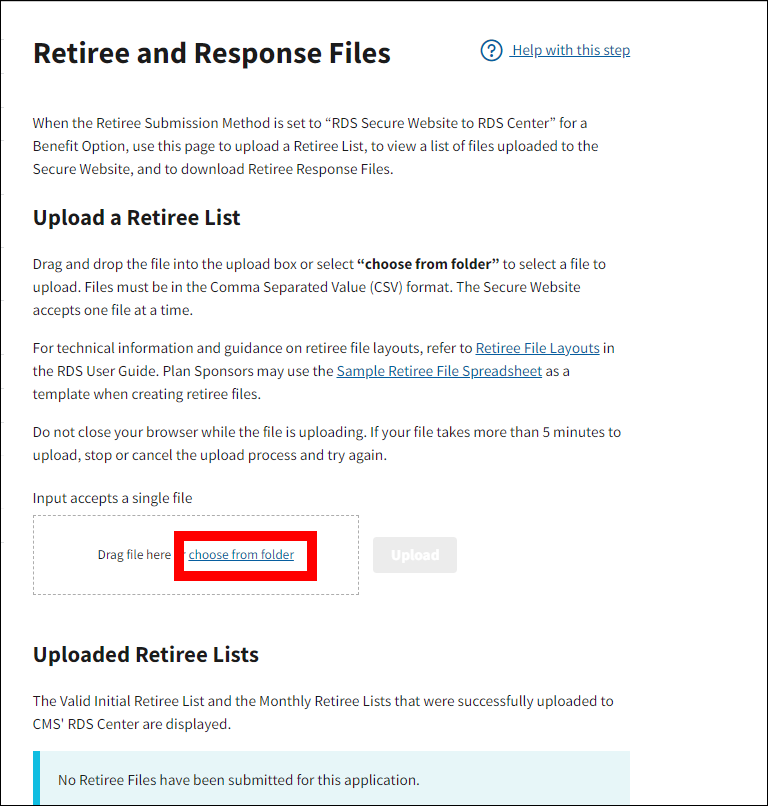
Select Choose from Folder to browse your network for the file you wish to upload.
Note: You can only upload one Retiree List at a time.
-
Verify that the correct file name displays in the Upload a Retiree File text box. If necessary, select Change file to select a different file.

-
After verifying the file, select Upload.
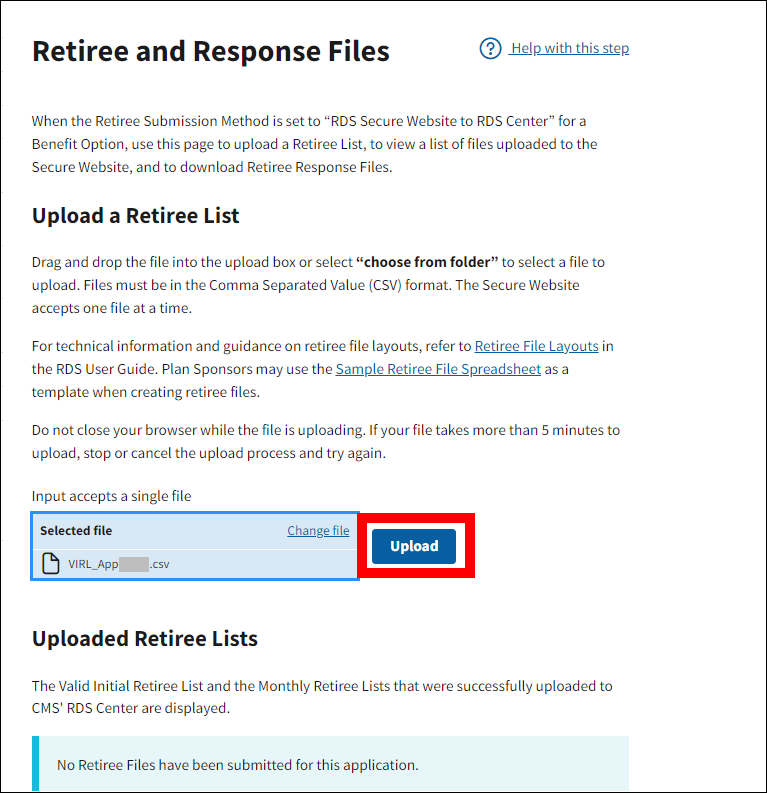
-
A progress bar will display while the file uploads. Do not close your browser while the file is uploading.
The file is reviewed for format, correct transmission method, Application ID, and Unique Benefit Option Identifier (UBOI). If CMS' RDS Center has problems reading the file or the format is incorrect, an Error message will display indicating the errors that must be corrected. For more information on errors received while uploading a file, refer to Retiree File Upload Errors.
If the file passes the initial validation and is formatted correctly, the Retiree and Response Files page will display a Success message and the file will be added as a row in the Uploaded Retiree Files table, including the File Name, Received Date, and Source.
Note: This Success message does not indicate that the Retiree List processed successfully, only that it has been successfully uploaded to the Secure Website.
